When I was growing up my Papa called me his princess. My husband and son treat me like one to this day. Yet, for the longest time I was a pauper to the clutter in my every day life in my home and my finances. Then one day I decided it was time to stop living like a pauper and to be the princess everyone thought of me as. This is the journey I took to de-clutter all aspects of my life and become a true PRINCESS!
Showing posts with label Home Organization. Show all posts

Wednesday, August 6, 2014

OFFENDING HOME OFFICE: PART 17


It’s amazing what you uncover as you clear and area.  Things long forgotten slowly work their way to the top and you often wonder “why do I still have that?”  

Years ago I “played with dead people” on a daily basis.  No I am not a mortician, I’ll leave that to my friend Sharon.  Nor am I freak of some sort.  I am an amateur genealogist and for a long time pursuing the ancestry of my children was all enveloping.  I spent a LOT of money on magazines, newsletters and much more.  

While clearing a small bookshelf from the debris that was on and surrounding it I unearthed all these magazines.  Some I’ve never even opened and probably never will. 


Oh I still have my love for genealogy, but now I do most of my research online or by visiting the actual sites.  These research materials I am certain hold great info for someone, but I do not see me using them for some while.  Therefore they do not pass rule #1 of the reasons to keep them. 
But the back of my mind keeps whining , “but you may want to look through them some day and find a very valuable clue. “
What to do?  I really wanted that shelf space for something else, but I hated the idea of possibility of losing even a single clue.  Then I hit upon the perfect solution.  
Our local small town genealogy society!  I knew their resources and finances were really low and that they didn’t have any of these magazines, quarterlies or newsletters when I last looked there.  That is why I bought them. 
I also knew there were people that were searching those same areas as I am.  So I decided to “share the wealth” and donate them to the genealogy society along with some church membership photos from the 1920’s and similar other materials that I knew were hiding in the closet and file cabinet.  Both of those were yet to be cleaned out and organized.  I was not looking forward to either of them.  But they were on the list to do in the very near future.
Most of these items I can easily scan into my computer using the document feed and then look at them to my heart’s content and have that shelf space for my craft room.
That way they would be available to me when I wanted to use them and others would benefit as well.  I like that. 
 
This is something to consider when you are clearing things out.  If something is of historical or genealogy significance, be it a written text, ephemera, or an old photo and you no longer want it, please donate it to your local historical or genealogy society.  They are always looking for new finds and have very limited budgets.  Your donation could help someone else in a big way.
Okay, I’m off my soap box now.  Back to the book case.  Once I made the decision to donate those quarterlies that left me with a nearly clear shelf to put my Cricut cartridges on.  
I know of people who own over 300 Cricut cartridges.  Even with my recent purchase of four new ones on a great sale I am no where even near 25.  So I currently only need one full shelf and space for 1-3 more on the second shelf for them.  Still I decided I would use this little bookcase for my cartridges.  It is strategically located between my work computer and my Cricut machine on my work table.  Where better to put them? 
I started alphabetizing them then ran into a problem because some of them had came in blister packs rather than the nice boxes that held the overlays and cartridges.  Plus the new universal overlay ones I had were in a box less than one third the size of the original boxes.  BUMMER!  I wanted a uniformed look.  Time to get creative. 
Many people like separating their cartridges all into one box with their booklets and overlays elsewhere. There are a lot of really good examples of this on the web.  I’ve seen clever containers made out of a flat lidded box that are divided with cut up pieces of plastic canvas to make perfect cartridge size containers, but that separates the overlays and booklets from the cartridge.  I don’t like that personally.
I know me.  If I have them stored separate something will turn up missing, or the overlay will get torn or something.  I prefer to keep mine all together, snug in a secure box.  So when I am putting the cartridge up when I am finished with it I only have to go to one source for storage.
I could put my few boxless ones in my juke box and put the overlays and books in the bottom of that, but then I’ll forget where they are and not use them to their best advantage.  Better to have all the cartridges together so I could pick and choose as I wanted from one spot when crafting.

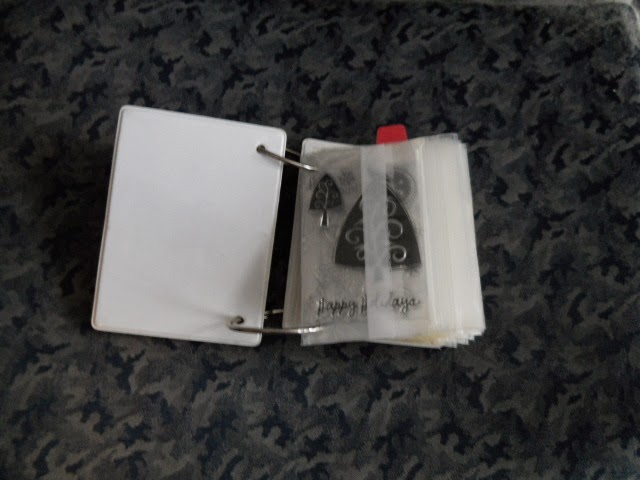
So for those that have their individual overlays the only option was to create a similar box for those few cartridges that needed it.
First I alphabetized the ones that had the original boxes.  Then using one as a pattern I used my envelope punch board to create a box the same size for each cartridge I needed one for. 

It turned out to be a bit more of a challenge than I had planned and I spent most of one day creating them. The procedure was simple enough once I had the punches right.  My next post will include photos, measurements and how to’s to make similar boxes to fit on your shelves with your Cricut cartridges, because it would make this post far too long for those not interested. 

I knew that I still had a lot of the original box cartridges to purchase in the future, so I didn’t want to designate a whole shelf right away to the tiny new universal overlay type boxes.  
That’s when I discovered the little boxes would fit easily on the shelf in front of the original style ones, without any dangerous over hang.  Problem solved.  I could double row the boxes, see where everything was and still have a great universal look.
INSERT PHOTO OF CARTRIDGE SHELF
I moved on to the second shelf from there.  It was filled with various sizes of three ring binders.  One by one I opened them to find that either the info in them was something I no longer needed or it was something that could be scanned and stored on the computer.  An example of this were my copies of various print outs of different ancient family genealogies that I had either purchased or been given of long dead ancestors and their numerous branches. 
The out of date info was of course discarded and the genealogies set over to be scanned as time rolled on. 
Once these were scanned they would join the quarterlies I was going to donate to the genealogy society.  Again a win for everyone involved.
That left the bottom shelf nearly empty for now, but that won’t be a problem.  I can put decorative items there until I need the space for those all important cartridges
I did decide to leave my old CD container on the top of the bookshelf because not only did it fit easily, it still had several slots available in it that I could use in the future to put cd cases of stored scrapbooking items in once I determined what I wanted to store in them.  There are a lot of options for such storage.
The other slots are filled with genealogy research CD’s and they need to be right by my computer for when I am doing research.
My computer desk has a built in CD rack as well and my most often used research cds are there.
So at the end of the day I found myself with a well cleaned and organized bookshelf that I could now easily access and enjoy. It will be even better as soon as I get those boxes built.
Plus the enjoyable task ahead of me reading the various genealogies as I scanned them for permanent storage and the joy of sharing the source materials with others.

Jan who loves it when things work out that way in OK
.


Friday, March 28, 2014

OFFENDING HOME OFFICE: PART 13


This part should be titled “Hidden Treasurers”.  As I spent so many days culling more and more I finally got around to looking through some boxes, baskets and tins that had been stored unopened for years.  I don’t mean 1, 2 or even five years.  I mean years and years.  

I knew what was in them but since I had closed my sewing business I had not really had a need to get into sewing and embroidery storage containers that had belonged to my mother and grandmother, both long deceased.  

However, since I was trying to gain as much space as possible in this room for the three of us to work comfortably I finally opened them and started digging through.  I found so many treasures that I could immediately see uses for not only for actual storage, but for the building of projects once the room was done.  

I also found I could easily create more of some of these items to increase their value potential for storage options.  

We’ll start with the shipping box I knew held my grandmother’s embroidery tools.  My Granny loved to embroider. I wrote about the lovely tea towels she made over the years in my TeaTowel Memories post.  She also did quilts, baby blankets,  bedspreads, tablecloths, satin pillow cases, you name it.  If it could be embroidered she did it.  So I was certain all the box contained was her hoops, a few needles and skeins of floss.  I was wrong. 

Not only were there other sewing tools like thimbles and needle threaders, but there was a little ingenious notebook holding some of her floss.  


It held numerous small plastic zippered bags that could easily be labeled with colors or what have you, they looked like tiny Ziploc freezer bags.  She used it to sort out her threads for different projects.  Most of the bags were empty.

I immediately looked past the floss and at the possibility of a paper crafting uses for it.
The bags were too small for embossing folders or dies, and it would need to be something thin and not sharp.  Unmounted stamps popped to mind!  

But my mind wouldn’t stop there, what if it was slightly larger? Of course there are all sorts of sticker notebooks out there that are on the same line using a 3 ring binder and ready made pouches.  OR you could make your own using pieces of repurposed cardboard, book rings, and freezer zipper bags  with holes punch in them in various sizes to make the exact size you needed.

So I put that project in the “to do” section on my brain, for when I needed a rest break.  

As I worked my mind drifted to what it would take to create such a notebook.  I quickly realized all I needed to purchase would be the rings because I purchase the freezer bags in bulk at Sam’s Club and because we seldom use freezer bags I had an over abundance of them on hand.  

By inserting a piece of scrap cardstock in the freezer bags they would be rigid enough to use my 3 hole punch on them to put them in a binder or to allow the library rings to go through. 

The day before we had hauled a over-sized printer box full of corrugated cardboard downstairs to go to the recyclers on Friday.  There was my cardboard source. 

The cardboard could be decorated with scrapbook paper I had ran through my Xyron or I knew I still had some end rolls of contact paper on hand.  I’d need to see what colors I still had.  I love using up what is on hand to make room for new stuff. 

I then thought long and hard about what I would really want to put in them, yes them, because I was thinking numerous versions of this project in various sizes.  Also would I want to give up the shelf space for such notebooks.

Then there were the three ring binders we had in the closet to consider.  Yes, I have numerous three ring binders on hand that could be re-purposed easily to hold various items.  Should I want to donate the shelf space to them and use my Sterilite drawers for other uses.  I decided that the “build a notebook” project would go on hold for a few days at least while I made up my mind exactly what I wanted to put in them. 

If I needed 1”-3” notebooks I could use the three ring binders that we have so many of.  Bigger projects I’d need to build.  So more decisions would need to be made. 

On one group I am on one woman used just the ring strip from several binders to make one very large sectioned notebook for all her stickers similar to the sticker systems that are for sale on the net.  That would require a permanent location for me to do though and I simply do not have such a location, or that many stickers—yet. 

The reason we have so many three ring binders is years ago a company dh worked for moved their offices and discovered that since they were paying the movers by the pound that it would be cheaper to replace a lot of their equipment and office supplies than to pay to have them move them.  So for one weekend the employees were offered the opportunity to take whatever was left in the multi-floor office building.  We worked so hard that weekend and came home with everything from thumb tacks to microwaves, including over 100 three ring binders in various sizes.  Over the years we have slowly been using the binders up, but I still had several of the thinner ones we had yet to touch and as I had culled the office I found many of the 3” ones contained pages of no importance so they too could be emptied and reused.  So that was a consideration if I wanted to do full size notebooks too.  Decisions, decisions.

If I do create some I’ll definitely do a separate post on it.  

Digging further through the embroidery box I found a pair of snub nose pliers.  Yes, I could see me possibly using those in my creating in the future, they went into the carousel on the work table.

There was also a small manicure set with a pair of very sharp little detail scissors and orange sticks that I could use to curl papers with.

4” plastic canvas circles emerged as I dug through , rulers—what crafter doesn’t always need a ruler? And embroidery transfer patterns..ideas for uses for those formed quickly. Because I have the capabilities to do svgs I decided the transfers could be VERY useful in creating some of my own designs. All these treasurers were in a shirt box. 

When I saw the embroidery transfers I remembered somewhere in this room I had a Ramen box full of this type of transfers.  I would need to find it and put them all together. Especially since I had figured out an additional use for them.

Because I am trying to not only organize things, but make them attractive I started thinking about what I could put my granny’s embroidery floss in.  I know that I’ll be using it for various projects, especially stitching on cards and scrapbook pages, so I didn’t want to get rid of it.  Then I remembered I had a lidded Americanna basket not being used for anything in another room.  It turned out to be just the perfect size to put the floss in.  

I decided to donate the plastic canvas to our local charity resale shop, because I haven’t worked with plastic canvas in years and probably won’t any time in the near future.  

I of course kept the little notebook.  There it took me just a few seconds to put the few unmounted stamps I have in it.  They fit perfectly.
As you can see I added a self adhesive index tab at the top of the page to indicate these were Celebration stamps.  I'll add more tabs as I add more stamps.  The tabs were, of course, leftovers from a much bigger project of years gone by.

So I had decisions to make as to what to do with it all.  I grabbed up my mother’s large sewing basket thinking maybe some of it could go in there and well, that is another post.


Jan who loves it when she finds treasurers like she found today in OK

Tuesday, March 11, 2014

OFFENDING HOME OFFICE: PART 10


So continuing on with how using your computer to organize your craft room to save you both time and money, not to mention making your room more of a creative space and less of a cluttered mess.

How do I use the computer?  Let me count the ways.

1.  I am constantly cruising various sites like facebook, pintrest, ebay, blogs, utube and numerous other ones for ideas on everything from organization, to how to videos.   At first I use to simply bookmark these sites into my favorites, but soon it became clear I needed to be a wee bit more organized on that aspect.  After all I research constantly on information I post in my blogs, how to do something I previously didn’t know how to do, homesteading info, travel info and much more.  That meant I needed to be organized about my book marks.  It’s simple enough to do, just create subfolders and when you save a bookmark or a favorite you save it to the correct subfolder.  Here’s an example:
a.     Main favorite folder-crafts
                                                              i.      Subfolder-cards
1.     Pop-up Cards
2.     Subfolder-techniques
a.     Distressing
3.     Subfolder-ideas
a.     Subfolder-holidays
                                                                                                                                      i.      Subfolder-Christmas
By doing the folders in my favorites/bookmarks this way should I want to watch a utube video on how to distress cards I can go to just those websites on that subject.  Or if I want to look at ideas for Christmas cards, they are all grouped together.  This can save hours of searching for a video you watched back in June in the month of November. 

2.     As mentioned in the previous post, warranty files and other important data on my equipment are readily accessible.

3.     I create a lot of greeting cards and I use the various fonts on my computer to put the verses in them by using Word to do so.  Once I create a card I create a file for that card that includes a photo of it, any construction notes such as which cartridge, die or embossing folder I used, a saved copy of the word file I made, sometimes even a scanned image of the paper or cardstock I used if I want to duplicate identically, so when I got to make another copy of the card all I need to do is print it.  Time saved for certain.

Because we are working again on our small card business this file also includes the stock number, what papers were used and any other valuable notes.  Including sales records on it.

4.     What do you have and where is it stored?  Many people find they feel they don’t need this file, but I do.  The what more than anything.  It’s easy to say you know exactly what embossing folders you have when you only have a few and are using those few constantly.  But what about when your inventory of folders grows?  Are you really going to remember all 100 folders, what they look like, what brand and what size they are?  If so your memory is far better than mine.  I keep this file not only on my computer, but also on phone, because I never leave home without my phone and you never know when you will stumble upon a sale.

5.     Photos of completed projects, items you would like to create, etc. This one is self explanatory.  Far easier to scan or take a photo from a craft book or magazine and store that rather than a whole magazine for one item.  Many magazines are now sold in digital form as well.  I’d much rather have a digital file I could electronically search in a matter of seconds for a specific project than spend an entire afternoon looking for a project I need the how to’s in a hurry for.  Don’t get me wrong, I love looking through hard print books and magazines on a leisurely afternoon, but not when I am looking for a specific idea I saw somewhere in a hurry.

6.     Recipes for homemade supplies, like glimmer spray, alcohol inks, modgepodge, paper etc. Create a folder for them, put the info there titled exactly what it is and you never have to dig through paper files again looking for that note you jotted down when you saw the how to on it. I often include the website or utube video address when applicable in that note as well. 

7.     I also keep a list of consumables that I use the most on both my computer and my phone so when I find a sale, I can take advantage of it.  In that file I keep records of what it costs normally and what I generally get it for on sale. I’ve actually created this file in my Grocery Tracker ap on my phone. 

8.     An I want list.  Ever get to the craft store and think “there was something I really needed to pick up the next time I was out but now I can’t remember what it was?”  Well keep a list, on your phone and on your computer, use the ap GroceryTracker if need be. I do I have the store labeled “Craft Store” and then can keep a running “needs” list in it

9.     Inventory is essential to keep a record of on the computer if you sell what you produce in your craft room.  

10.                        Tax records if you are running a home based business with your crafts.

11.                        Photos, we all have tons and tons of them.  They take up a lot of space, get lost, torn, fade or otherwise become unusable in our various projects.
These I scan into various folders, based on who or what they are of, family tree, family vacations, completed craft projects, holidays, the list goes on.  

 Once they are scanned and copied to a back-up or two then I disperse the photos to other people.  I start by offering them to the people in the photos, and other family genealogists.  If they are of historical landmarks and are really good photos I will send them to a historical society.  Some will get used immediately in craft work, but immediate means immediate.  After I have covered all my possible sources to give them to then I disperse them to the trash.  I know that sounds harsh, but like any other excess paper they are taking up valuable space and are a fire hazard.  Not to mention they fade over time.

12.                        If you use certain die cutting machines they use svg or digital files,of course you want to store them on your computer for easy access.

13.                        I recently read on one of the facebook groups I’m on that more and more scrapbookers are printing their own cardstock and paper.  I can see  definite advantages to this.
For example: if you were doing a two page layout on your trip to the Grand Canyon and had a beautiful panoramic photo of the canyon you could water color print your cardstock with that photo for a one of a kind background.

Another example: was if you were creating for an income and a particular paper or cardstock needed to be used for numerous items there is always a chance you would not be able to find that particular paper product, then what do you do?  Enter your computer and printer to save the day.  

Yes, they do sell printers that will print 12 x 12, we have an HP 7610 that does exactly that, and it will handle cardstock easily.  So after reading that helpful hint I foresee me using that printer more and more instead of strictly using my all in one like I normally do.

14.                         On an organizational group I am on for scrapbooking I recently saw a notebook a woman had put together that had all the images from her various Cricut cartridges in it.  I decided to take this one step further.

Again because I have so few cartridges at this point this little project didn’t take me long at all and now I can look to see what images are available in my library without having to pull every single cartridge off the shelf.

I scanned the front and back of each cartridge box, including the ones I made into a file labeled Cricut cartridges.  I titled the scans by their cartridge names with frt and bk on the end of the name meaning front and back.  This put all the images into one general file that I could simply scroll through.

However, I also copied the scan a second time  with the name of each cartridge in a subfolder with 1 and 2 as the end of the name so there would be no problem with duplicate files alerts popping up. Ie: Damask Decor 1, Damask Decor 2

The computer automatically puts the cartridges in alphabetical order.   That way if I want to look at what is on Damask Décor and compare it to Winter Lace I can do so easily without having to scroll through all the other cartridges.

A third thing I did with this folder was I made notation of the following website address: http://mycutsearch.com/  at this website if you are wanting to know what cartridge you would find a certain image on you can put in a search term like “rose” and it will bring up all roses on the various cartridges, along with any phrase or word cartridges with the word rose from the Cricut library.  That way you can instantly see if you have a cartridge with a rose on it, or if you were to purchase a cartridge which ones would have roses on them.

A note here about scanning your cartridge boxes.  Most scanners do not have a lid that will adjust for scanning things as thick as a cartridge box and you may have trouble getting a clear scan.  That problem can be remedied easily by placing something flexible and light colored over the box as you scan it.  A white bath towel works great.  

Another plus about scanning these images is the ability to enlarge the size on the screen to see if the detail of the particular image is what you want for your project.

15.                        Designing your layouts, whether it is with the Cricut Craftroom, Design Space, Autocad or simply the design software of your die cutting machines you can design on the computer and save instantly when Aunt Jane calls on the phone without fear of something being spilled on your design while you are away from it.

Those are but a few of the uses, but I bet once you start thinking you will be able to come up with more ways to cut the clutter in your craft room/home office.

Jan who will next do a short post on how doing this project will save you money.